
If the history of -418 interests you click here
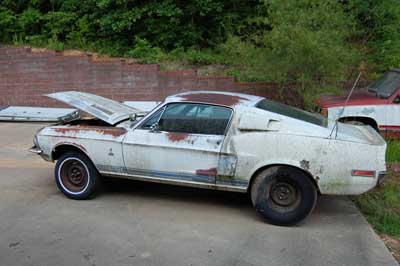
1968 Shelby GT500 out of the weeds
85K Original miles
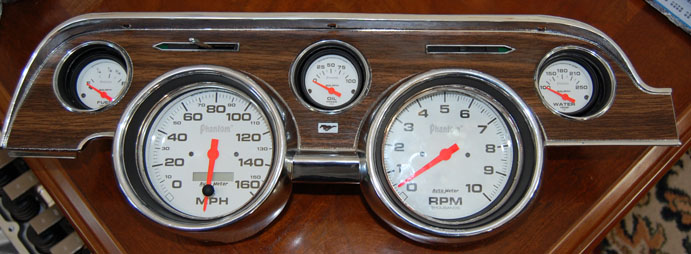
This is the new gauge cluster complete with Autometer Phantom gauges
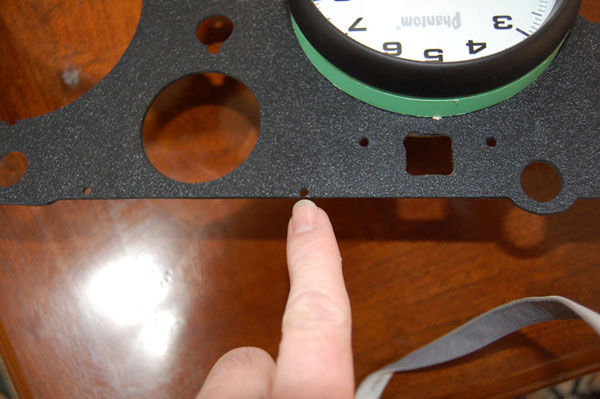
I bought the gauge support from CJ Pony parts, it is a real piece of crap. The hole I am pointing to is in the wrong spot. The large holes were too close together and several more holes were wrong. The holes for the lights were not even round and were not all the same size. I would try one from somewhere else.
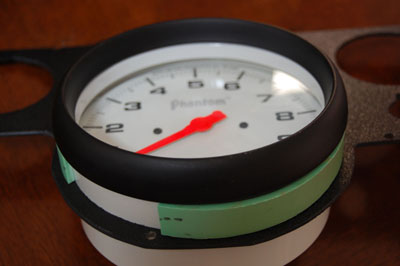
This green spacer places the speedometer at the correct depth so that it is sandwiched between the cluster and support. When the gauge support is bolted down it is very sturdy and seems like it will remain in place rather well.
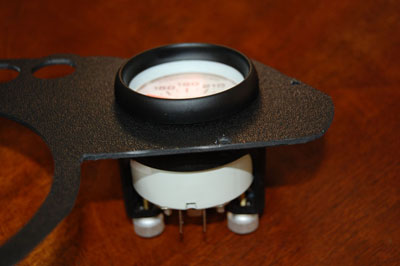
The small gauge is placed in the gauge support and held in place by the parts supplied by Autometer. I considered placing the small gauges in the factory gauge bezel. This placed the gauges much farther toward the driver and looked very well in that position. The black part of the Autometer gauges was just big enough to catch in the factory bezel. I would have to modify my hold downs but that would not have been very hard to do. The reason that I didn't do that is that the speedo and tach must remained very deep and I wanted all of my gauges at the same depth.

I cut holes so that these aligning pins would stick through the gauge support. This helped me to position the wiper switch. I simply used self tapping screws to attach the wiper switch.
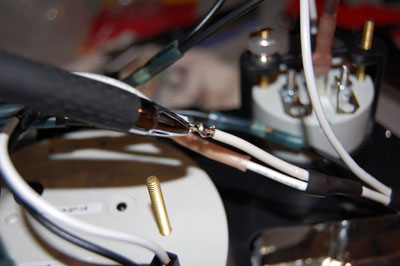
The wiring on the back of the gauges is very hard to keep neat looking. This seemed like the best way to go if you have a solder gun and soldering skills. I used a single wire for the hot wire on the lights as a "trunk" wire that all of the gauges share. I then attached wires as "branches" onto the "trunk" and soldered the attaching points and covered them with heatshrink.I repeated this "trunk" wire for the ground for the lights as well as the hot wire that supplies power to each of the gauges.This allowed me to use only three "trunk" wires to supply power and grounds to 3 attaching points on each gauge. This really cut down on the amount of wires on the back of the cluster. If you can't do it this way, NAPA has a "solder and seal" connector that you can use with a heatgun. It too makes a very clean and neat connection. You can barely make out a couple of those blue connectors in the background of the above picture.
I will post more pictures as the project progresses over the next few months.